
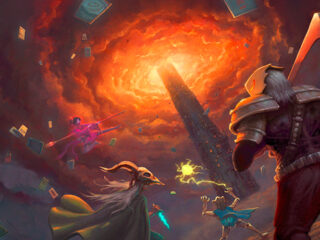


Introduction
The infamous Final Fantasy III—the real one, not the one we in America know as FF3, which was actually Final Fantasy VI. This is the real deal. After over a decade and a half, we get a new 3D version of a classic game that we can now pay for rather than play an illegal ROM of.
Ready? Here we go!

The Alter Cave
The game opens with Luneth falling into a cave and realizing that he’s got to get out. When you exit, a cut scene starts and you fight with the first boss, Land Turtle. After you beat the ferocious Land Turtle, a voice calls out to you to be a hero. It turns out to be the Crystal and it sets you free with the task of saving the world!
Ur and Kazus
You leave the cave and enter your hometown of Ur. Speak with Elder Topapa, your adopted father, who tells you that you are chosen to save the world by gathering the crystals. Typical.
Arc, your BFF, is being made fun of in the top-right part of the Ur map. Arc runs away from the bullies and sets out to prove he’s not a coward.
Leave the town and head south to Kazus where Arc is waiting. Though he tries to be brave, you scare him and he joins your party. Equip him with something useful.
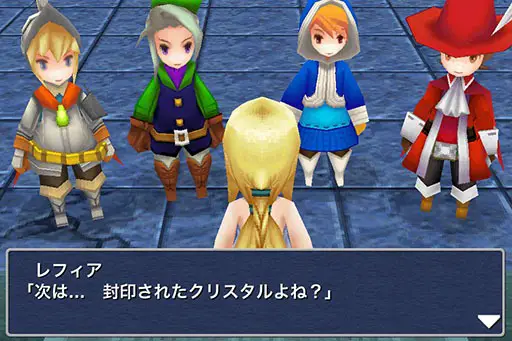
When exploring Kazus, look for Cid in the inn and learn that the people of Kazus have a curse put upon them where everyone is a ghost and the town is also blocked by a giant rock. When talking to Cid you get access to the airship and charged with the task of finding the Mythril Ring that restores everyone back to normal, but Takka the town smith is a ghost and his daughter Refia has gone missing!
The airship needed to fly out of there is in the desert west of the city. Refia, the missing daughter, is holed up, being lazy. You have a small back and forth where she confesses to being useless because she can’t make the much needed Mythril Ring, but luckily the King of Sasune has one. So you venture off to convince the King to let you use it.
Castle Sasune
You fly to Castle Sasune and see that—surprise, surprise—Castle Sasune is cursed too! Ingus, the castle’s knight greets you. You now have the 4th member of your party and the final Warrior of Light.
Head straight into the throne room and learn that the curse of Djinn has befallen everyone and the ring you need to save them is missing, along with the King’s daughter, who has the ring.
You have to then look for the secret passageway in the Sealed Cave for the skeleton key which can help somehow, I guess. They don’t say. Just look for it, monkey.
Head north above Castle Sasune and you’ll find the Sealed Cave.
The Sealed Cave and Becoming Warriors of Light
At the basement level of the Sealed Cave you can find a skull; zoom in on the skull and you’ll unlock a passageway that leads you to the missing Princess Sara.
She joins the party as she is a noble warrior princess who is an NPC.
You find Djinn, who looks like an evil genie. He can’t be banished by the lovely Princess Sara, so kick his ass and get ready for a twist.
After banishing Djinn, the Warriors of Light are transported to the Crystal room. I guess the Crystal wanted to speak with you.
The Crystal has infused you with the Power of Light. With the light, you can gather strength from the other crystals and become the legendary Warrior of Light!
Huzzah!
Cue the credits and watch a tutorial from a cute Moogle about how to change jobs. You’ll need it in the future.
Escorting Cid to Canaan
After you leave the Crystal Cave, head back to Castle Sasune where you bless the Mythril Ring in the holy spring and save the cursed people.
For your deeds, King Sasune rewards you with a magical folding canoe? Okay, fair enough.
Head back to Kazus. Refia leaves your party when you enter the town, so go and speak with Cid again.
Cid asks for an escort to Canaan to see his wife again. Head to Refia’s house and speak with her father who’s going to make you a mythril ram for the airship so you can leave this one-horse town.
Head north into the Mythril Mine and, in the top-right corner, zoom in on the water bucket and open the secret passage. This leads right to the mythril you need for the ram. Go to the airship and who’s waiting? Refia! Joyousness!
Ram the crap out of the rock. The airship gets destroyed, so you gotta walk to Canaan. Once entering the town, Cid tells you that he only made the hull and that you have to speak with King Argus who built the engine.
If you go speak with Cid, you see that his wife is sick and a bottle of Elixir can cure her. Search around the town you can find the Elixir on a rock in the middle of the river. Get it and go get Mrs. Cid well again. For your trouble, you can enter a secret room where you get all kinds of goodies.
Dragon’s Peak and Saving Desch
Go into the inn where a crying, depressed woman is missing her beloved Desch. You take charge to find the vagrant. You can find him by heading next door to Dragon’s Peak.
Whenever you reach the top of the peak, you are carried away by the dragon and dropped off in its nest. In the top, left-hand corner is Desch, a cheeky little bastard that gives the best advice to run away from the very powerful dragon. Desch gives you Mini after you escape.
When you escape the dragon you land near Tozus and you get a chance to use Mini to visit the town.
The Town of Tozus
After using Mini, head south and wander around a bit and escape from any battles; you will lose them in your current mini state.
Head through Tozus to the other side of the mountains and arrive at Viking’s Cove.
Viking’s Cove and Nepto’s Temple
In Viking’s Cove you hear that a sea dragon destroyed the ships of the Vikings and they are all really pissy about it.
When you beat the Sea Dragon, you get their finest ship, the Enterprise! Salutations, plot device!
When you exit the cove, look for Nepto’s Temple. Nepto is the pissed-off sea dragon.
When you arrive in the temple, you see a statue of Nepto that has a jewel for one of its eyes missing. Use Mini to enter the head of the statue and make sure that all members of your party are either Black Mages or White Mages. This is going to be one of those levels.
Battling through Nepto Temple you find the Giant Rat, who has been holding onto the missing eye jewel.
When you take the jewel and place it back in the eye of Nepto, he gives you the Fang of Water. Return to Viking’s Cove and you get the Enterprise as Nepto has cooled his jets.
Castle Argus
When you get into the Enterprise, head northwest for Castle Argus to speak with King Argus, the master of the airship’s engine.
When you enter the castle, head into the second room. The farthest right candlestick on the wall opens a secret room with some goodies.
After looking around a bit and taking in all you can, you see that there’s no one here.
Exit the castle and change jobs back to what you had originally, if you want to.
Tokkul and the Village of the Ancients
Get back in the Enterprise and head south. Look for the small village of Tokkul that has been ransacked by invading forces from the western desert. And, surprise again, they were wearing the seal of Argus, the castle that had been deserted when you went looking for help from the king. You also hear rumors of a floating tree monster as well from the old folks that are still left in the village.
Once you’ve had your fill of Tokkul, head west past the desert through the forest to the Village of the Ancients, home of the sons and daughters of ancients who used to protect the Tower of Owen and the pillar that once supported the floating continent and divided the light and the dark. If you talk with the townspeople, you can learn about the history of light and dark that once yadda, yadda, yadda. Typical Final Fantasy storyline about the past.
When you exit the village, you can see a clearing with a small patch of woods inside. Go into that small patch and find Chocobo Woods!

Gulgan Gulch and the Tower of Owen
Head north and look for a cave. This is Gulgan Gulch, home of the Gulgans, a race of blind people that can see the future. Head downstairs and obtain the spell Toad that will allow you to enter the Tower of Owen.
In the Tower of Owen is where you discover the destiny of Desch, who had previously mentioned that his memories had vanished yet he was still compelled to journey along.
The Tower of Owen is east of the Gulch and is on a peninsula. Make sure your party is well-rested and equipped ‘cause we’re going in!
Going into the Tower of Owen, make sure you turn everyone into a toad. Turn left, head down the hall, turn right at the first hallway, go to the end, and turn right to go down the last hallway. Become a toad and enter the tower.
Once you get into the tower, reverse the Toad spell and continue on.
The Tower of Owen is real simple: climb the stairs, gather stuff, kill the boss.
One note: when a small cut scene cues about being lost, Desch will mention a switch for a hidden passageway. It’s right behind you in the small section of the walkway.
In another cut scene, Desch gives more clues as to who he is and keeps the mystery alive and well.
When you get to the top of the tower, you see the evil Medusa trying to destroy the tower in the name of Xande, the main bad guy of the game.
Medusa is weak against ice, so use Blizzard as often as you can and take her out.
Upon beating Medusa, Desch reveals his true destiny: he is the guardian of the tower—an ancient. Oh, snap!
He was sleeping on the job and was supposed to awaken when the tower was in danger and, because he was late, the only way to save the world is to sacrifice himself by flinging himself into a fire pit to stabilize the tower.
Before Desch dies, he teleports you to safety and tells you that the Power of Fire, the Fire Crystal, is on Dwarf Island. The maelstrom that was blocking you from entering has been cleared and you can progress.
Dwarven Hollows and Underground Lake
Head north and around the bend until you see a cave. Don’t enter now—that’s the Molten Cave, but don’t be stupid enough to stay. At least you know where it is. Below the cave is the Dwarven Hollows; that’s where you need to go.
Next to a platform is a little dwarf. Talk to him and you learn that Gutsco, some prick, has run away with the Horn of Ice through the underground lake! Let’s get him and kick his ass!
Turn yourself into a toad and head down the stairs at the far left-hand side of the screen. Jump into the lake and let’s seek out that pain in the ass, Gutsco.
The Underground Lake is a fairly straight shot right to Gutsco. When you get to him, beat him up with Fire spells.
Now that you have the Horn of Ice, turn back to the dwarves and, if you noticed that shadow following you, it was Gutsco. Told you he was annoying.
He steals both horns, now that you’ve led him to the shrine, and he escapes to the Molten Cave to get the power of the Fire Crystal for himself. Let’s go get him… again!
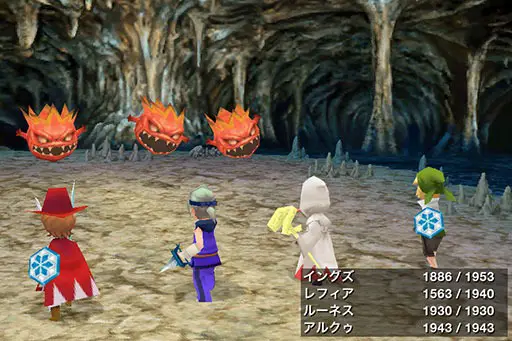
The Molten Cave
The Molten Cave is the same as any other dungeon. Look around and, if you have the patience and the skill level, gather as many items as you can.
There is, however, one small, tiny, little… problem. There’s molten lava on the floor that you can walk in, but every second you’re in this inescapable evil your party is damaged! Welcome to the deal breaker, kids; it’s annoying, but easily dealt with if you have the right number of potions and a strong enough White Mage.
The Fire Crystal is not that hard to locate. When you get to a portion of the cave where there’s a dead end with a treasure chest and a rock, zoom in on the rock and open the door to the side.
Enter the Crystal room and Gutsco attacks with an ugly monster called Salamander. As Salamander is a fire element, use Blizzard and beat him down. When you do, you obtain the power of the Fire Crystal and the Horns of Ice.
When you go back to the Dwarven Hollows, you obtain a magic key, an item that can open anything. Use it to get the dwarven treasure and loot to your heart’s desire.
Returning to Tokkul
As you exit the Hollows, you see a Tokkul citizen collapse and tell you that the village is about to be destroyed! Make haste warriors! You’re needed AGAIN!
You learn that Hein, a bad guy with the power to change his weak point, is stirring stuff up. Only a “Scholar” can see through his lies. Make Refia a Scholar; equip her with a Book of Fire and a Book of Ice from the dwarf treasure cove; level her up with some grinding; and let’s go kick some shapeshifting ass!
When you enter Tokkul, you are paralyzed and captured… So much for that. You are taken to Castle Hein.
Captured at Castle Hein
Turns out Castle Hein is in a carved-out and cursed Elder Tree of the Living Woods. Not only that, the Argus soldiers that have been causing trouble are also cursed by Hein, the advisor of King Argus. What a prick.
Head to the farthest right cell and use Mini to enter a small hole in the right hand side.
Welcome to Hein’s Castle. Make sure that Refia is a Scholar and is equipped with a Book of Light and a Book of Fire.
When you fight Hein, make sure that Refia uses Study to locate the weak point of Hein because it changes all the damn time.
Once he is defeated, you restore peace to the soldiers of Argus as well as the Living Woods, and get the Fang of Wind for your trouble.
The Elder Tree then tells you that you have to leave the floating continent and go down to the Darkness, aka the Surface World.
Cleaning Out Castle Argus
Head to Castle Argus to get the Wheel of Time, a family heirloom that can power an airship to take you to the surface.
Once you get the Wheel of Time, change Luneth’s job to “Thief” and explore the Towers of Castle Argus.
Head back to Canaan to speak with Cid, who turns the Viking ship Enterprise into the airship Enterprise.
Cid then reveals the biggest plot twist of the game…You are not from the Floating Continent, you are originally from the surface! Ten years ago you were out with Cid on the airship, then a darkness engulfed the airship, crashed it, and the only survivors were the Warriors of Light and Cid, the repeating wonder of the Final Fantasy series.
Going to the Surface World
Before leaving the Continent, stop off in the city of Gysahl. There are some useful spells at the Black Mage shop.
Fly off the Continent to trigger the cut scene that takes you to the Surface World.
Once you get on the surface, you can see that it’s not like anything you’ve seen before. Check the overworld map and head for the one island in this desolate world.
It’s a wrecked ship and onboard is a woman under the care of an elder named Miss Aria. Time has stopped and darkness has covered the surface. Miss Aria tried to stop it, but failed in her charge. She is weakened. Use a Potion or Hi-Potion to help her.
After she is well enough, she will have you take her to the Temple of Water, which is southeast of the wrecked ship.
Temple of Water and the Cave of Tides
Within the Temple of Water is a crystal shard that needs to be taken to the Cave of Tides that can break the seal of the Crystal that Miss Aria and her fellow priestesses created to protect the Crystal from the darkness.
The Cave of Tides is just above the Temple of Water. Head through it and watch Miss Aria pray to open the seal and enter inside.
The Cave of Tides is a labyrinth. You will get frustrated with the frequency of the random battles, but it’s okay, you need all the grinding you can get. The next boss is not exactly a pushover.
Find the Crystal room. Watch the cut scene in which Miss Aria pushes you out of the way to save you from Kraken, another lackey of Xande, the bastard who’s causing all this trouble. Time to kick this prick’s ass for killing Aerith—I mean Miss Aria.
Kraken is weak against lightening, so beat him down and light him up.
After Kraken is defeated, you are given the Power of Water by Miss Aria. An earthquake cuts off Luneth’s melodrama and the waters recede to reveal the Surface World under the tides.
While Luneth is unconscious, you are charged with finding a person named Doga, the only one who can help you defeat Xande. Doga is on the continent of Dalg.
Town of Amur
You come to a town called Amur. You need to go into the sewers for Levigrass Shoes that allow you to find the last Crystal. Look for old man Gill, who can give you the key.
When you’re in the sewer, you see these four old men being attacked by some toads. Save them, ‘cause they suck and thought that they were the legendary warriors.
When you get to the bottom of the sewer, you see an old woman named Delilah. She can give you the Levigrass Shoes that allow you to cross the bottomless bog and get the last Crystal.
Goldor Manor
Once you are teleported out of the sewers, you can cross the bog to Goldor Manor. Explore the golden house and grab the treasures therein.
When you arrive at the Crystal room, you’ll fight Goldor himself. After you beat his ass soundly, he destroys the last Crystal!
Head back to get your ship. The key you gain from defeating Goldor releases the chain on the Enterprise.
Fly the Enterprise to the capital of Saronia, but when you fly near the castle, the Enterprise is destroyed! You don’t know why they fired on you, so, damn it, let’s find out.
Capital Saonia
Head to Northeast Saronia and begin the climb of the Dragon Spire to get some badass items.
In Southeastern Saronia you can find a young boy being picked on by some guys because he claims to be the prince heir. Defeat them and it turns out it is Prince Alus, the rightful heir to the throne of King Gorn.
Turns out the King has gone nucking futs. Help get Prince Alus back into the castle to stop the madness of King Gorn.
When you try to enter the front gate you are stopped. Then, unexpectedly, you are allowed inside…You sleep through the night…or so you think… The King tries to murder his own son!
Turns out another rogue advisor has cast a spell on another hapless king. Gigameth is the name of this particular fiend and once you kill him ,the King, who had stabbed himself to protect his son and break the spell, dies… Tragic… But all hail the good King Alus! Now take what you can find and look for the engineering room to get a brand new airship, the Nautilus.
Doga’s Manor
Head south with your new kickass ship to Doga’s Manor where he tells you that the reason Xande is causing so much trouble is that he was granted mortality by the Great Magus Noah. He is trying to stop time so he can continue to live forever. Doga joins your party and you must escort him to Cave of the Circle. Load up in Doga’s Manor with spells and items. Rest up if you are weakened.
Cave of the Circle
Once you trigger the door for the cave entrance, use Mini to shrink down to enter the Cave of the Circle.
When you get to the end of the cave, Doga is about to die. He casts a spell that allows the Nautilus to travel underwater. Doga then gives you the directions to the Temple of Time, where Noah’s Lute rests.
You can use the lute to call Unei, Doga’s friend, back from the world of dreams and then obtain the ancient ship known as the Invincible.
Optional Mission: Sunken Cave
There’s an optional mission here now. If you can find a triangle-shaped island south of Doga’s Manor, you can enter the Sunken Cave. It’s full of awesome stuff and it’s worth if it you can survive.
Temple of Time and Unei’s Shrine
When you enter the Temple of Time, you head down to the bottom floor of the temple. When you find the lute, nothing really happens, just exit the temple and head north to Unei’s Shrine right above where you entered the Temple of Time.
When you enter Unei’s Shrine, she wakes up and charges you with taking her to the Ancient Ruins where the Invincible rests.
She gives you the Fang of Fire and with the Invincible you can get the Fang of Earth. With the four fangs, you can defeat the statues that guard the tower Xande has built for himself.
Ancient Ruins, Cave of Shadows and Returning to Doga’s Manor
When you enter the Ancient Ruins, Unei is useful in helping clear a path that had been blocked by an earthquake. The Invincible is in the bottom level of the Ruins just as everything else has been.
Once you leave the Ruins, head to the Cave of Shadows and get the Fang of Earth. Once you’re done there, go back to Doga’s Manor for the final piece of the puzzle.
That final piece of the puzzle is… Eureka. And how do you get Eureka? You have to kill Doga and Unei to complete the weapon that was scattered in pieces because of its immense power.
Defeat your friends, but, fear not, though their bodies die, their souls live on… or something less depressing.
Crystal Tower and Ancient Maze
With Eureka and the Sycrus Key, head for the Crystal Tower but, first, you must past the Ancient Maze.
Don’t let the name fool you. Walk straight ahead and you see the Earth Crystal being guarded by a fiend named Titan. Kill him and gather the light from the Earth Crystal.
The Ancient Maze is rather easy to get through and is less of a maze than you’d expect.
Now comes the final battle…the Crystal Tower and all the goodies that are within.
When you get to the top of the tower, you look into a mirror and get cursed with the Curse of Five Wyrms. Luckily for you, Doga is there to lend a hand by finding the five souls that have pure light, so just wait while he saves your ass.
The five are none other than the NPC characters you met throughout your journey!
Coming to your aid is Princess Sara, Cid, Desch, King Alus, and Gramps from the group of four old men who thought they were the warriors of light. Way to go, goodwill!
Xande is waiting for you on the other side of the mirror. Kick his ass, he’s earned it.
But even after you beat him, you’re not done. The Cloud of Darkness has descended upon the land. You have to take it out to save the world.
You fight the Cloud of Darkness and you are defeated with a particle beam, but luckily Unei and Doga fuse their souls with yours and you get another chance to win! Salutations, deus ex machina!
Now you enter the World of Shadows to restore order. Xande has been consumed by his own darkness and you have to go bring some balance to the world.
Final Battle: World of Shadows
You’re entering the World of Shadows to take on the Dark Crystals: First up, Cerberus; the second is Echidna; Ahriman comes in at third; and, finally, the not-so-creatively-named Two-Headed Dragon.
Once you defeat the four Crystals, you are introduced to the Warriors of Dark, who join you to destroy the evil entity, the Cloud of Darkness, who had previous kicked your ass before.
Once you face the Cloud of Darkness, the Warriors of Dark sacrifice themselves to help you win. Get ready boys and girls. This is one endurance battle.
Once you beat the bitch that is the Cloud of Darkness, you can enjoy the ending movie and credits. Watch them until the end. It’s quite enjoyable, if a bit cheesy.
So there, you beat it. Feel better? Was it worth the wait? What do you think, Final Fantasy fanboys and girl.
by Eric Miller
-
SCORE
-
SCORE 2