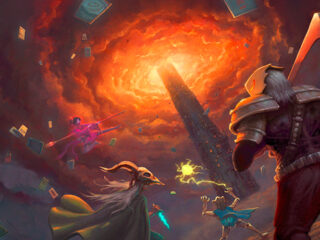


Part III: Tips & Dirty Tricks
Tips
It Pays to Be a Prick (Sometimes)
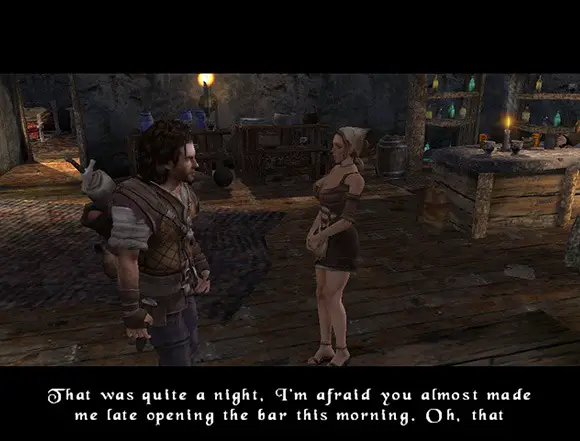
During many conversations the Bard has with other characters, the dialogue will pause and you will be presented with the option to say a nice or snarky response. In this game, kindness is not always rewarded, something that becomes apparent from the start, as the proprietor of The Drunken Rat pub, the Widow McCreary, evidently has self-worth issues and will only lay with the Bard if he’s a total bastard to her.
Unfortunately, you can’t ever truly guess what the best response is in any given scenario, which could lead to missing out on experience or items. As a general rule, if someone is being prickly with you, respond in kind and the same goes for if they seem like an amicable sort. However, this advice is not across the board true. If you’re worried about missing out on something, do remember that save points are relatively plentiful, generally making it not a huge hassle to experiment with dialogue options.
Also, when you meet a trow offering you passage across a river for a small fee, take his second offer (in other words, be snarky once, then nice). Trust me on this one.
Be Thorough
As with most RPGs, it’s best not to avoid too many battles, especially early on, so as to gain experience and make your Bard healthy, wealthy, and strong. Unless you’re going for a speedrun or something, you’ll also benefit from thoroughly exploring all towns and dungeons you come to. Talk to everyone you can and get involved with extracurricular activities (like listening to drunks sing). This is a great way to get chunks of extra experience in one go and will also help you to uncover most of the game’s sidequests. Completing these will reward you with new summon spells and tokens that boost your stats.
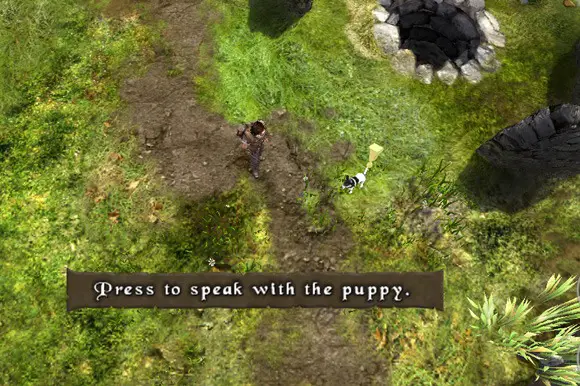
Get a Dog
Just in front of The Drunken Rat, you’ll find a dog by a well that you can talk to. Be nice to the dog. It will tag along with you, digging up underground treasures and attacking foes (once you learn the “Dog Training” skill). Really, the treasures the dog nets you are worth very little and he’s not a very capable fighter, but enemies are hugely distracted by him and he takes constant abuse, but never dies, providing you the opportunity to get the drop on your attackers—a great advantage.
The only reason to snark at the dog is if you’re trying to give yourself an overall harder playthrough. But who wants to be mean to a puppy anyway?
Hunting
Once you have a bow and a dog, you can go to the Fairyhaunt Woods and do some hunting. The dog will rustle up birds and you have to shoot them down. This will earn you a bit of silver (dead birds get automatically converted to silver somehow), but it’s honestly a slow and not hugely profitable process. It’s kind of fun for a little while though.
Don’t Break the Barrels at First
You may notice some barrels around and, as a gamer, feel the instinct to break them. Unless they’re in your way, however, don’t bother until you first find the barrel maker’s building (go all the way west and a little south of the Drunken Rat; it’s got its own stone cow pen with two cows in it). Smash all the barrels outside and the barrel maker will come out and make a deal with you to pay you for going around smashing barrels. Now go smash to your heart’s content.
Return to him after each time you smash 26 barrels (smashing more than that doesn’t earn you any more) to earn 500 silver. In later towns, you’ll find rooms and caves with barrels that respawn every time you exit and reenter. This makes racking up 26 barrels again and again really easy.
Keep in mind that, once you reach Chapter VI, you will no longer be able to make money this way.
Further Sidequesting
Again, most sidequests are discovered by speaking with townsfolk. However, a number of secret dungeons are unlocked on the world map by buying treasure maps. One goes for a pretty penny at the shop in Houton. The rest are sold by a wandering trow who randomly appears on the world map. Try entering and leaving a location until you spot him (he’ll look different from the other enemies).
Incidentally, the majority of these dungeons won’t be physically accessible, even after unlocking them, until late in the game.
Consider Waiting for the Explorer
It’s possible to brave some of the side-dungeons before finishing the Forest Tower, but you’ll find they’re riddled with obnoxious Prince of Persia-style traps. These are often difficult to successfully avoid with reflexes alone. The Explorer is a summon character you’ll find in a chest in the Forest Tower who trips traps for you so you can pass by safely. You might consider holding off on booby-trapped dungeons until he’s at your disposal, just to give you a few less headaches.
Before You Head to the Mountain Pass
Once you’re told to head to the Mountain Pass (Chapter VI), you might wander around and take care of some sidequests first. Once you enter the Mountain Pass, the game progresses linearly for a long stretch. You won’t be able to go for some of these sidequests (like the secret dungeons) again until after you finish this linear portion and some of them (pretty much any of the townspeople’s quests) will never be available again.
East Dounby Brothers
There’s a sidequest involving two annoying brothers in one of the game’s later areas, East Dounby. If you complete it, they’ll teach you a new summon spell. Make sure to use it as soon as you get it from them for some extra experience and a pretty evil cutscene.
Unlocking Behind-the-Scenes Stuff
Priests at town kirks or wandering the world map will heal you for a little silver, but will also unlock behind-the-scenes game stuff (cutscenes, bloopers, songs, artwork) if you make large donations of 100 silver This doesn’t affect you in-game whatsoever, but if you’re interested in this sort of the thing, priests are who you should be talking to. If you want to try and unlock everything, it’s best to do it earlier in the game as you can make multiple donations in one visit to the kirk priests, but can only do one donation at a time with the wandering fellows.
Dirty Tricks
The Light Fairy
In Chapter III, you’ll learn to summon the Light Fairy, who is a necessity for lighting up dark areas. However, he will also periodically stun enemies with a blinding flash. The strangest thing is that he literally almost never dies. Enemies wail on him constantly, but his health never deteriorates (your dog gets stunned on occasion, but the Light Fairy remains forever at attention). I kept him summoned for extended periods and only saw him die once over the entire course of the game. Considering his stun ability, plus the fact that enemies seem to be obsessed with attacking him over the Bard, the Light Fairy feels like a bit of an unfair advantage, and helped me to finish Chapter IX, Finstown, quite early in the game.
Honestly, I’m uncertain if the Light Fairy almost never dying might be a game bug, in which case it very well could get patched at some point.
Firing from Out of Range
Perhaps it’s deliberate, but this feels like just a fault in the AI. This doesn’t work everywhere, but, in any given situation, try moving away from a group of enemies until they stop following you, then just fire arrows in their direction from a safe distance. Even if the enemies are off-screen, you should be able to hear them getting hit and/or see them disappearing from your map as they go down. This isn’t a very fun or honorable way to play, but it’s effective.
Happy snarking!
<–Go Back to Part II: Strategy Simplified