


Many of us have fond memories of playing Nintendo Wii games with family and friends. Whether it was hours spent challenging each other in Mario Kart or Super Smash Bros, the fun definitely lingers. Good news: we can easily relive these moments on our Android smartphones. All you need is a Wii emulator and some setup time.
This article dives into all that’s needed to get those classic Nintendo titles up-and-running for free without a hitch. Here’s how to do it:
Get an emulator
Playing console games on Android usually requires an emulator, which is basically an app that replicates the original operating system.
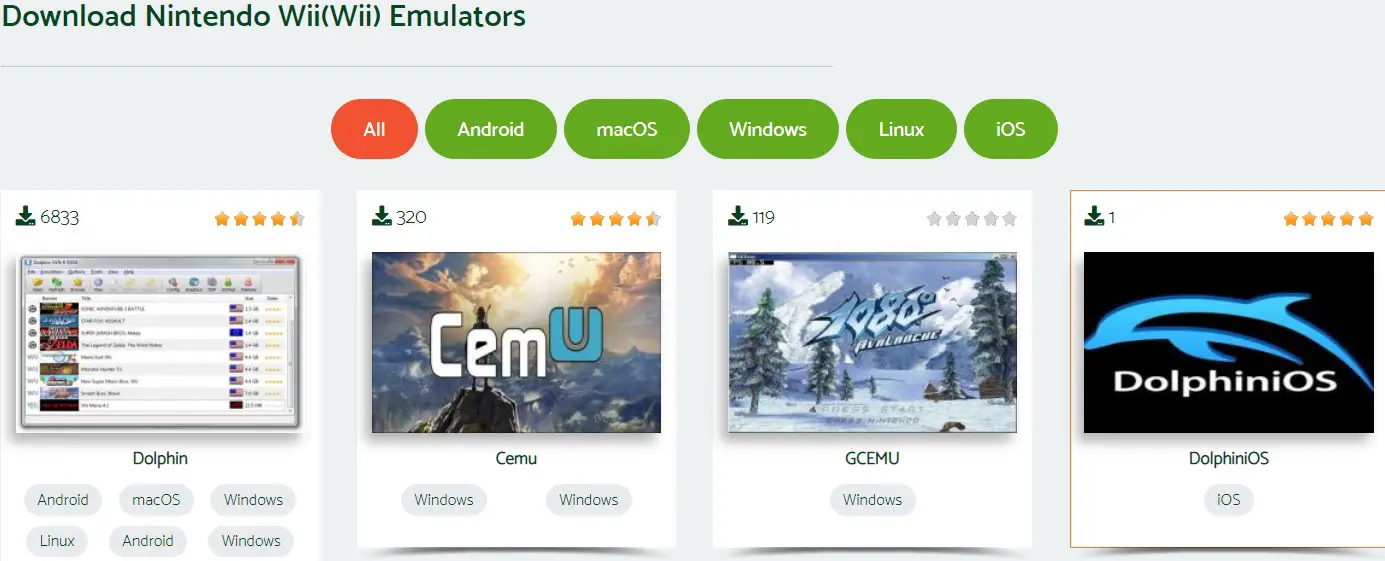
There are quite a few emulators for Wii out there, even more if you plan to search in unofficial sources too.
Dolphin is probably the most popular one. Besides, it’s been through a series of upgrades overtime, so it’s less likely to give you any bugs. Double check the requirements. If your Android device meets them, feel free to download and install the app.
Get some games
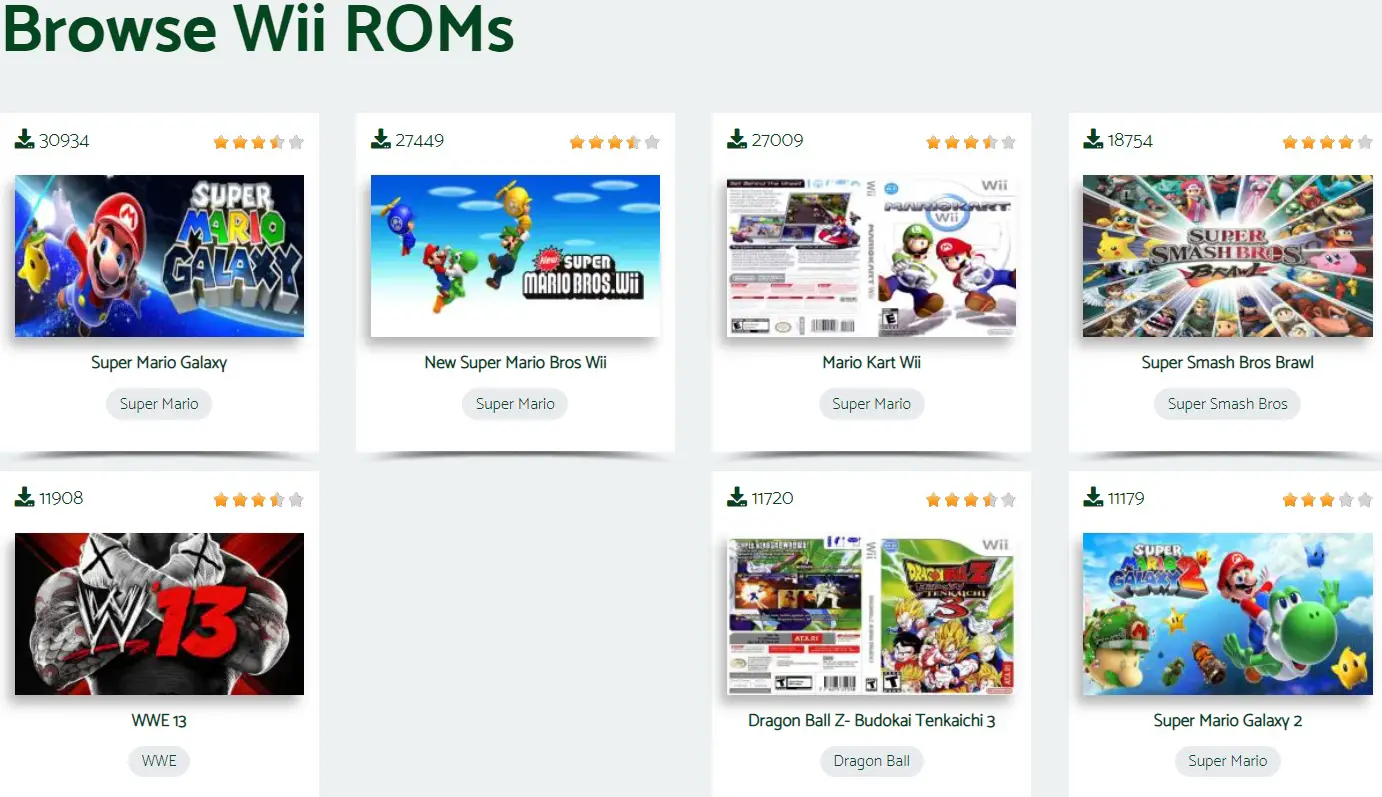
Emulators don’t come with any games. You’ll have to download games separately. Make sure you get them from a reputable source.
The good news is ROMs from Romspedia are 100% original, so there are no risks whatsoever. Follow the instructions to download the game on the device. For a Wii emulator, you’ll need a bit of space there since some Wii games can be pretty large. Double check and make sure you have enough space before starting the download.
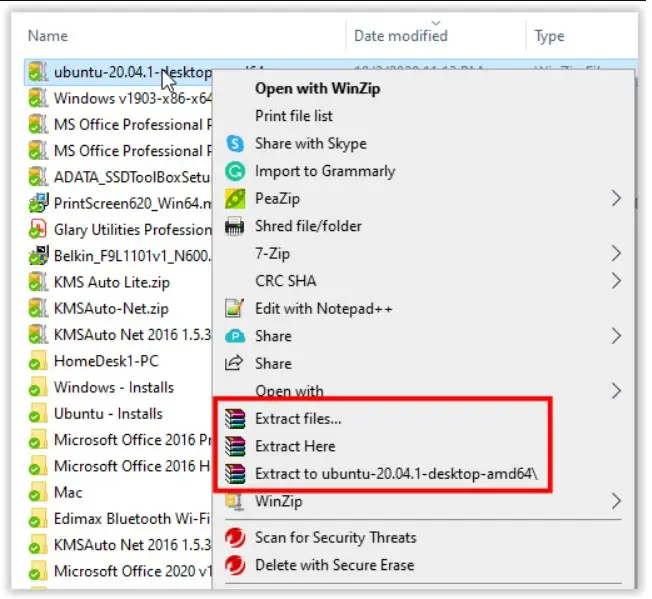
Extract and sort your game files
Most sources will allow you to download files in the ZIP format. The 7Z format is just as common these days. You’ll need an app to extract files. The final file should feature the.NKIT.ISO extension. Sometimes, you might be able to find downloads with this extension, no need to extract anything then.
In terms of organization, simply get all your downloads in one folder. All games should be together. It’s not mandatory, but it makes your job easier later on, as you’ll start looking for them.
While it may seem convenient to leave everything in your downloads folder, they’ll mix in with other files, so you’ll probably lose yourself while trying to find them.
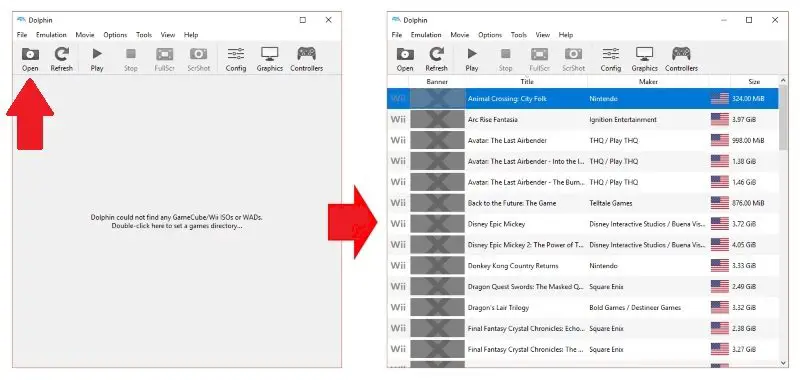
Load a game up
Go back to the emulator app, and you’ll find a plus sign in the menu to add games. Tap it, and you’ll be asked to locate the game. Go to the folder with all your games and make sure the Dolphin emulator can access it. Access should be on by default.
Once the game is loaded, it will pop up in the emulator. The cover image will show up too. Click on it, and the game will load.
Whatever folder this game is in will also be used to locate other games in the future, hence the importance of having everything together. Add new games to that folder, and they’ll automatically show up in the emulator. If you can’t see them, simply refresh the page.

Adjust settings and controls
Finally, based on the games you like, you may need to adjust the settings. It’s always a good idea to tone down some of them, especially since such games are demanding. You can also redesign overlay controls if you want more convenience.
Believe it or not, you can even hook up a controller with a Wii emulator, but it’s more technically demanding to do it. However, if you still have some old accessories related to Wii, they can connect to the phone for a more authentic experience.
Conclusion
Playing classic Nintendo Wii games on your Android phone is easier than you might think. By following the steps outlined in this article, you can quickly download an emulator and ROMs, load up your games, and adjust settings and controls to your liking.
Remember to only download ROMs from reputable sources to avoid any potential risks. With a bit of setup time, you can enjoy all of your favorite Nintendo Wii games whenever and wherever you want. So go ahead, relive those nostalgic moments, and challenge your friends to a round of Mario Kart on your Android phone.
-
SCORE
-
SCORE 2